AddaokConfigFiles
Steps to add AOK Configuration Files (Admin)
Note : You need to login as Super Admin, After successful login, to add AOK configuration files we need to follow steps given.
-
Select Inhalt (Content) -> Inhalt hinzufügen (Add Content) -> AOK Configuration files

-
Add appropriate titel (Ex. if Configuration files is for AokPlus then add AokPlus)
-
In the Field Group name 'Aok Configuration' select 'Select File Type'
-
Add filename (while adding the filename we need to follow some guidelines)
Filename Guidelines
- Filename should follow a-z names word should be seperated using underline '_' (Ex. aokplus_local_config.json, aokplus_theme_config.json).
- follow the format 'aokid_filetype_config.json'
- If configuration file adding for specefic plugin then filename should follow the format (aokid_pluginname_filetype_config.json)
-
Add json data in the 'Json data' field, Json data should be clean and formatted so it will not add the, html encoding special characters in the JSON response.
-
We can repeate the process to add one more configuration information click on 'Add Configuration' it will add one more fields group, we can repeate process can add multiple json config files.

-
You can repeate same process to add Plugin Specefic Configuration, you need to select 'Plugin' from the given list so it will add configuration for specefic plugin.

-
After adding go to extrem bottom of the page and click on 'Speichern (Save)' button ensure 'Veröffentlicht (Published)' checkbox is checked.

-
After adding content, we need to update the auther of the page to the user for which the page is belongs (AOK Users)
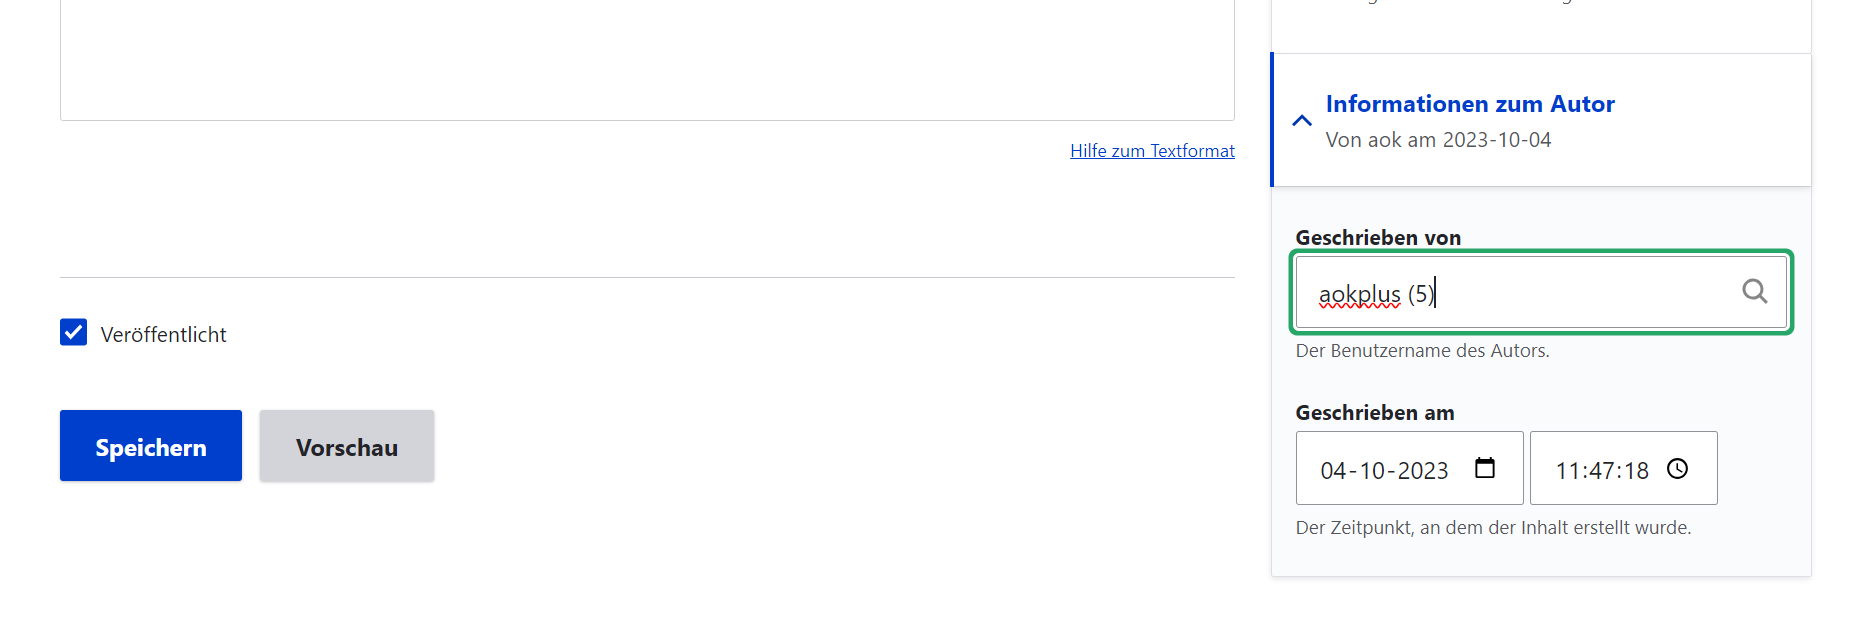
-
We need to provide grant for the AOK, after published click on Grants tab.
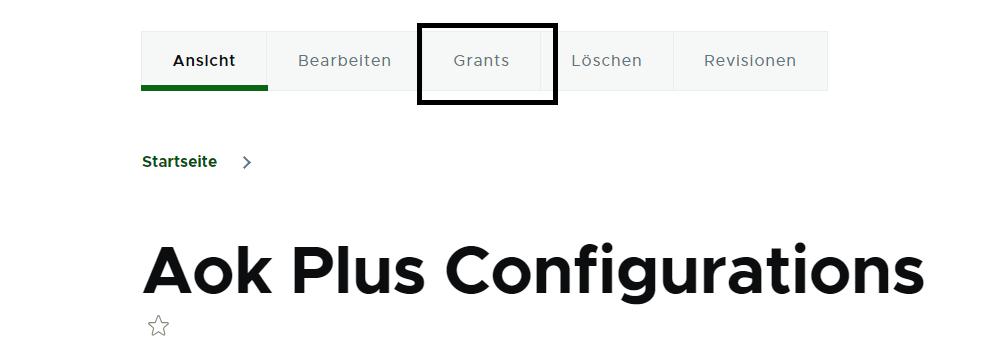
-
Give the permission for the Role (Ansicht, Bearbeiten) permission, select the check box and click on 'Save'

Edit AOK Configuration Files
To edit AOK Configuration Files follow given steps,
- Click on 'Inhalt(content)'.
- Choose the AOK Configuration Files to edit (check if Inhaltstype is 'AOK Configuration Files') -> Click on 'Bearbeiten(Edit)' button at right side respective at Titel column.
- Edit the page, after editing please make sure 'Vröffentlicht(published)' is chcked.
- Enter the revision log message in 'Protokollnachricht der Revision'
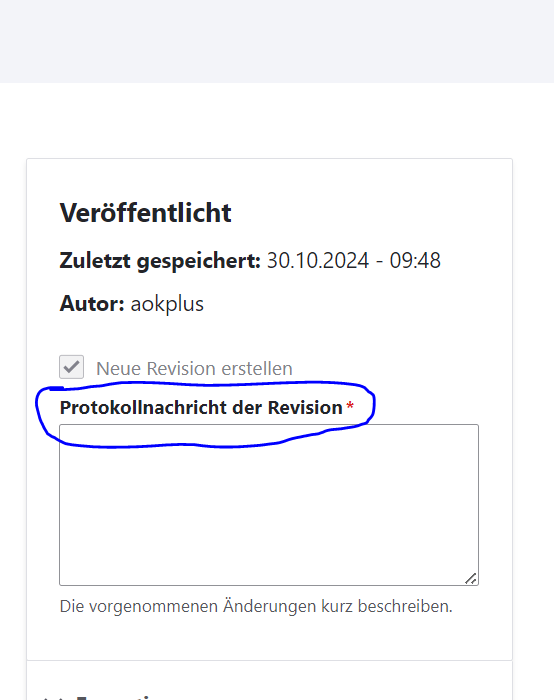
- Click on 'Speichern(Save)' button.
Important Notes
- Take current JSON file backup and save it.
- Compare the JSON structure with updates.
- Format the JSON structure by using json formatter tools.
- Update the JSON in Json Data text area, carefully update the data both IOS & Adroind apps actively using configurations, currupted json will make both apps un-responsive.
- Do not provide Grants for roles, it will make all AOK users to update the configurations.
- Verify the user before giving the grants, if it belongs to same AOK.
- clear content service cache to reflect the configs. Ex DEV url for content service cache : dev-ey.navida-cloud.plus.aok.de/content/api/v1/evictAllCaches
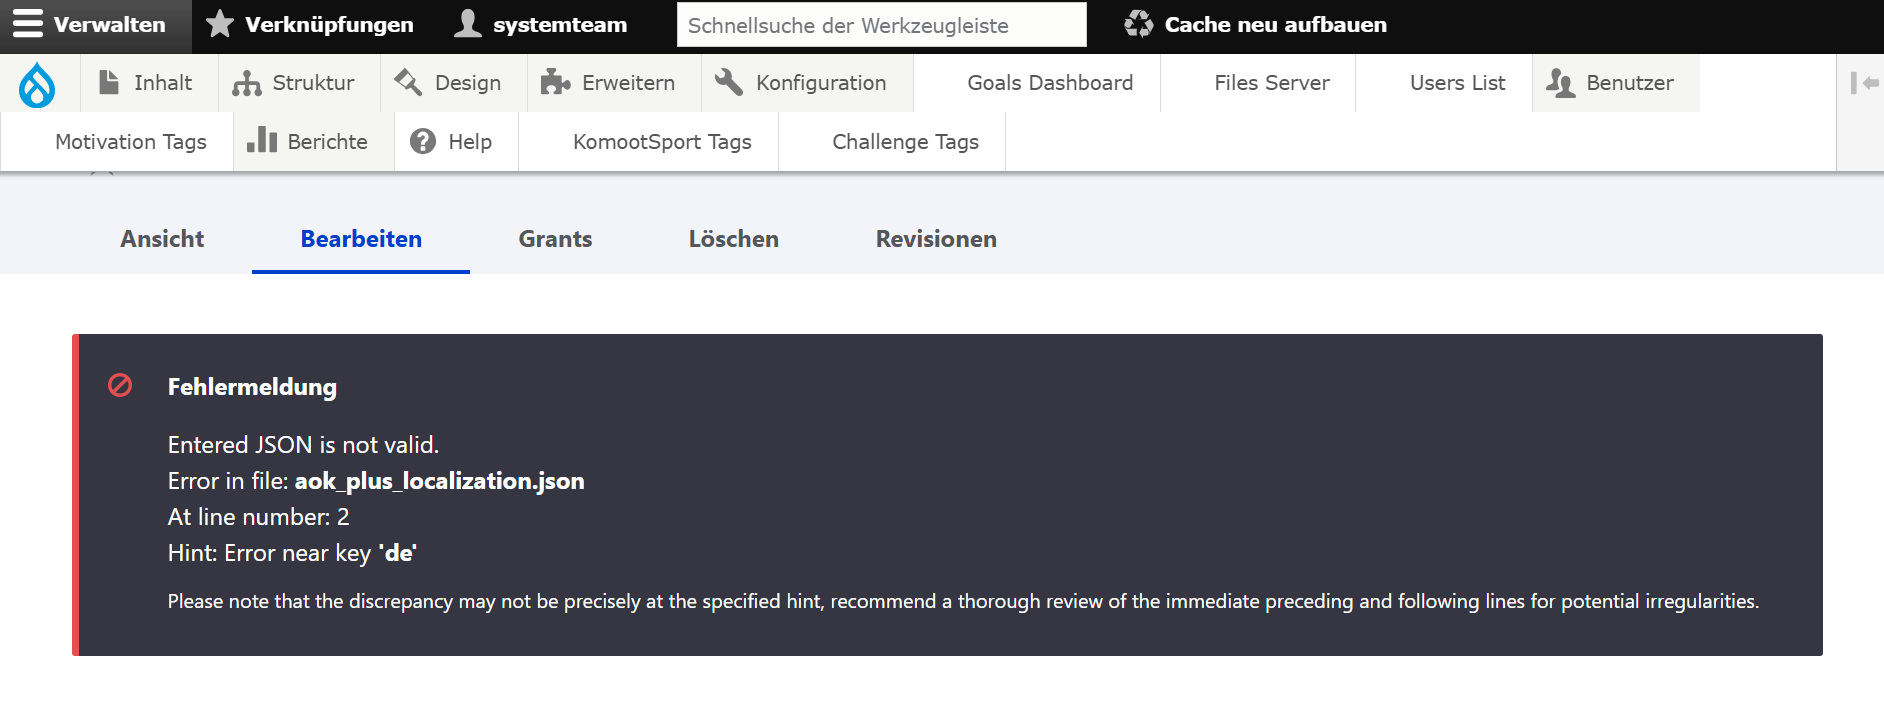
Validation of Json.
- In the current implementation, we check whether the JSON input is valid. If there is a syntax error, it will trigger an error message as shown in the example image below:
- Additionally, the image URL is validated. An error will occur if you provide an image URL that does not exist locally, or, in a development environment, if the URL does not correspond to a resource available on the development server. As show below:
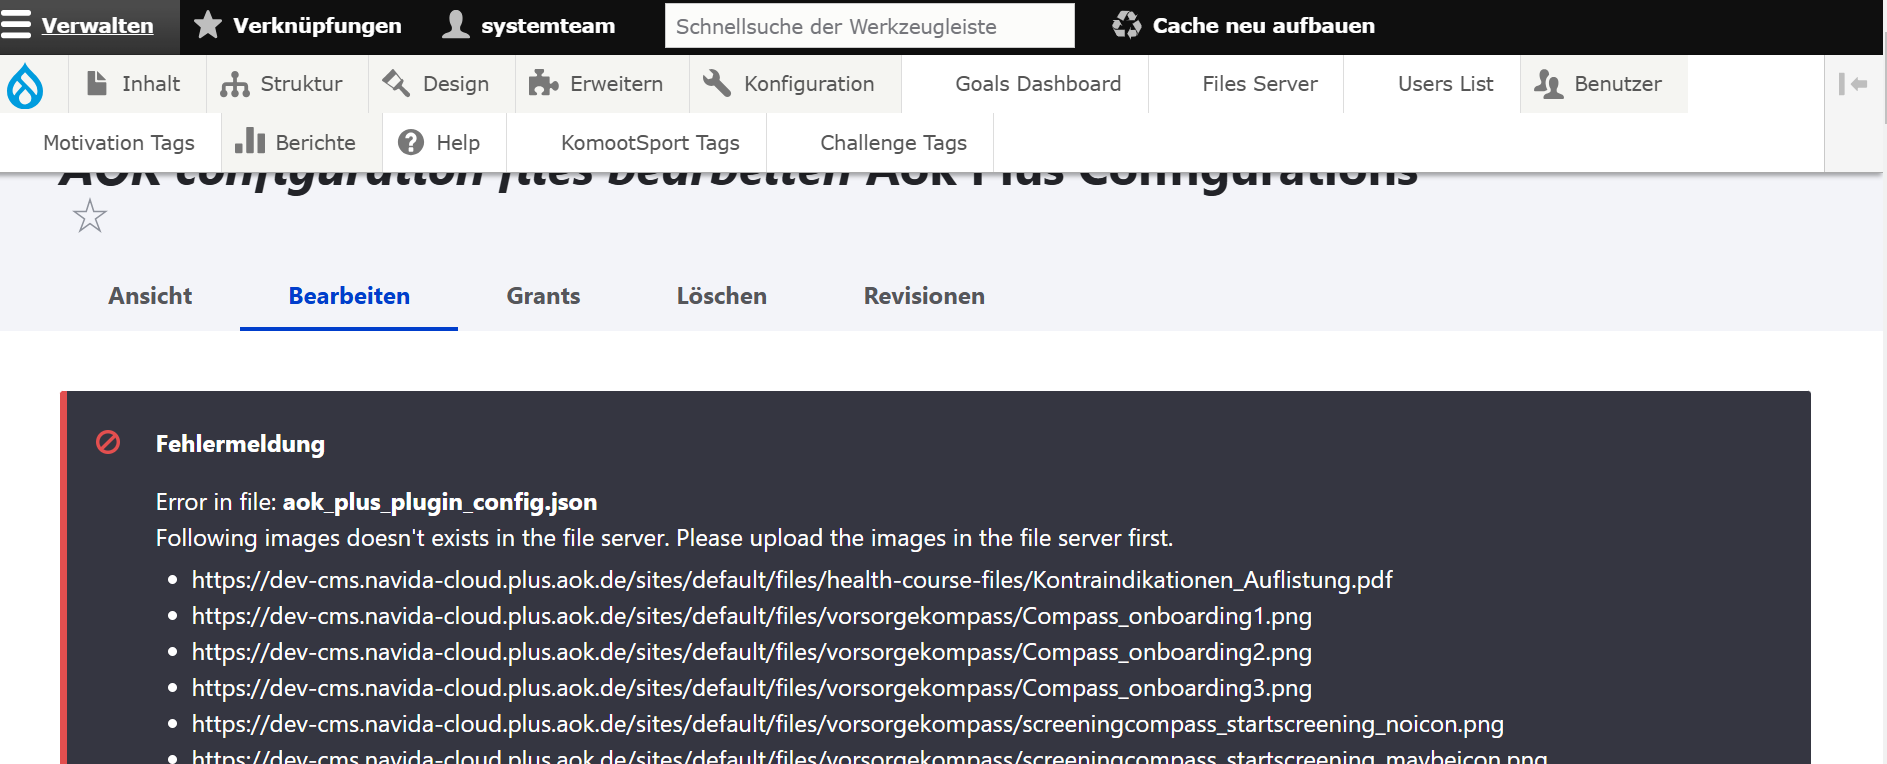 .This error will accur if the domain is in allowed domain list.
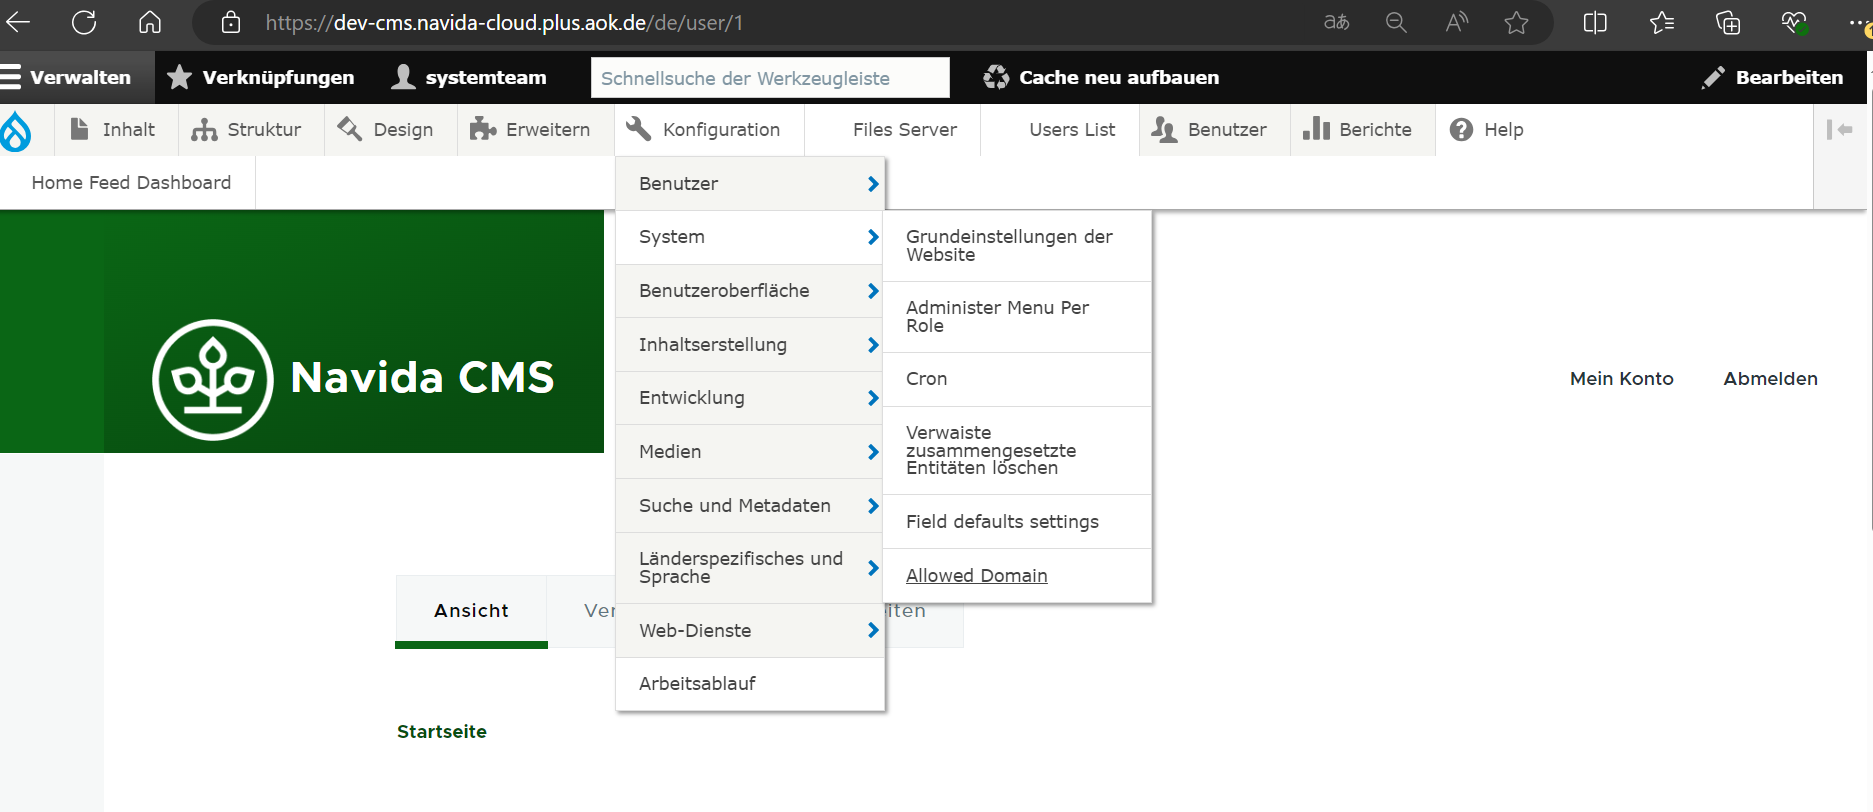
Allowed Domain
We can create a list of domain which are allowed in it site as given below:
- Navigate to the configuration settings by selecting "Konfiguration" (or "Config"), then go to "System," and look for the "Allowed Domain" section as illustrated in the image:
- Enter the domain that you wish to allow for the site. If you need to include multiple domains, follow the provided instructions to add additional entries.
